Making Your First API Call (Without Writing Code)
Part 7 of the APIs for Non-Engineers Series
Part 7 of the “APIs for Non-Engineers” Series
If you’ve followed this series from the beginning, you now understand what APIs are, how requests are structured, why APIs behave the way they do, how authentication works, how systems communicate through integrations and webhooks, and how to read API documentation with confidence.
What remains is the most practical step. It is putting everything you have learned into action.
This article shows how to make a real API call yourself, without writing code, using a simple tool. The goal is not to turn you into an engineer. It is to help you experience what all these concepts look like when they come together.
Once you’ve done this once, APIs stop feeling abstract. If you encounter unfamiliar terms, you can refer to the glossary here.
What “Making an API Call” Actually Means
Making an API call simply means:
- sending a structured request to an API endpoint
- including the required information
- receiving a structured response
You are asking a system a question or requesting an action, and the system responds. Until now, you may have discussed APIs in meetings or documentation. This step lets you see the interaction directly.
The Tool We’ll Use: Postman
Postman is a widely used tool for interacting with APIs without writing code.
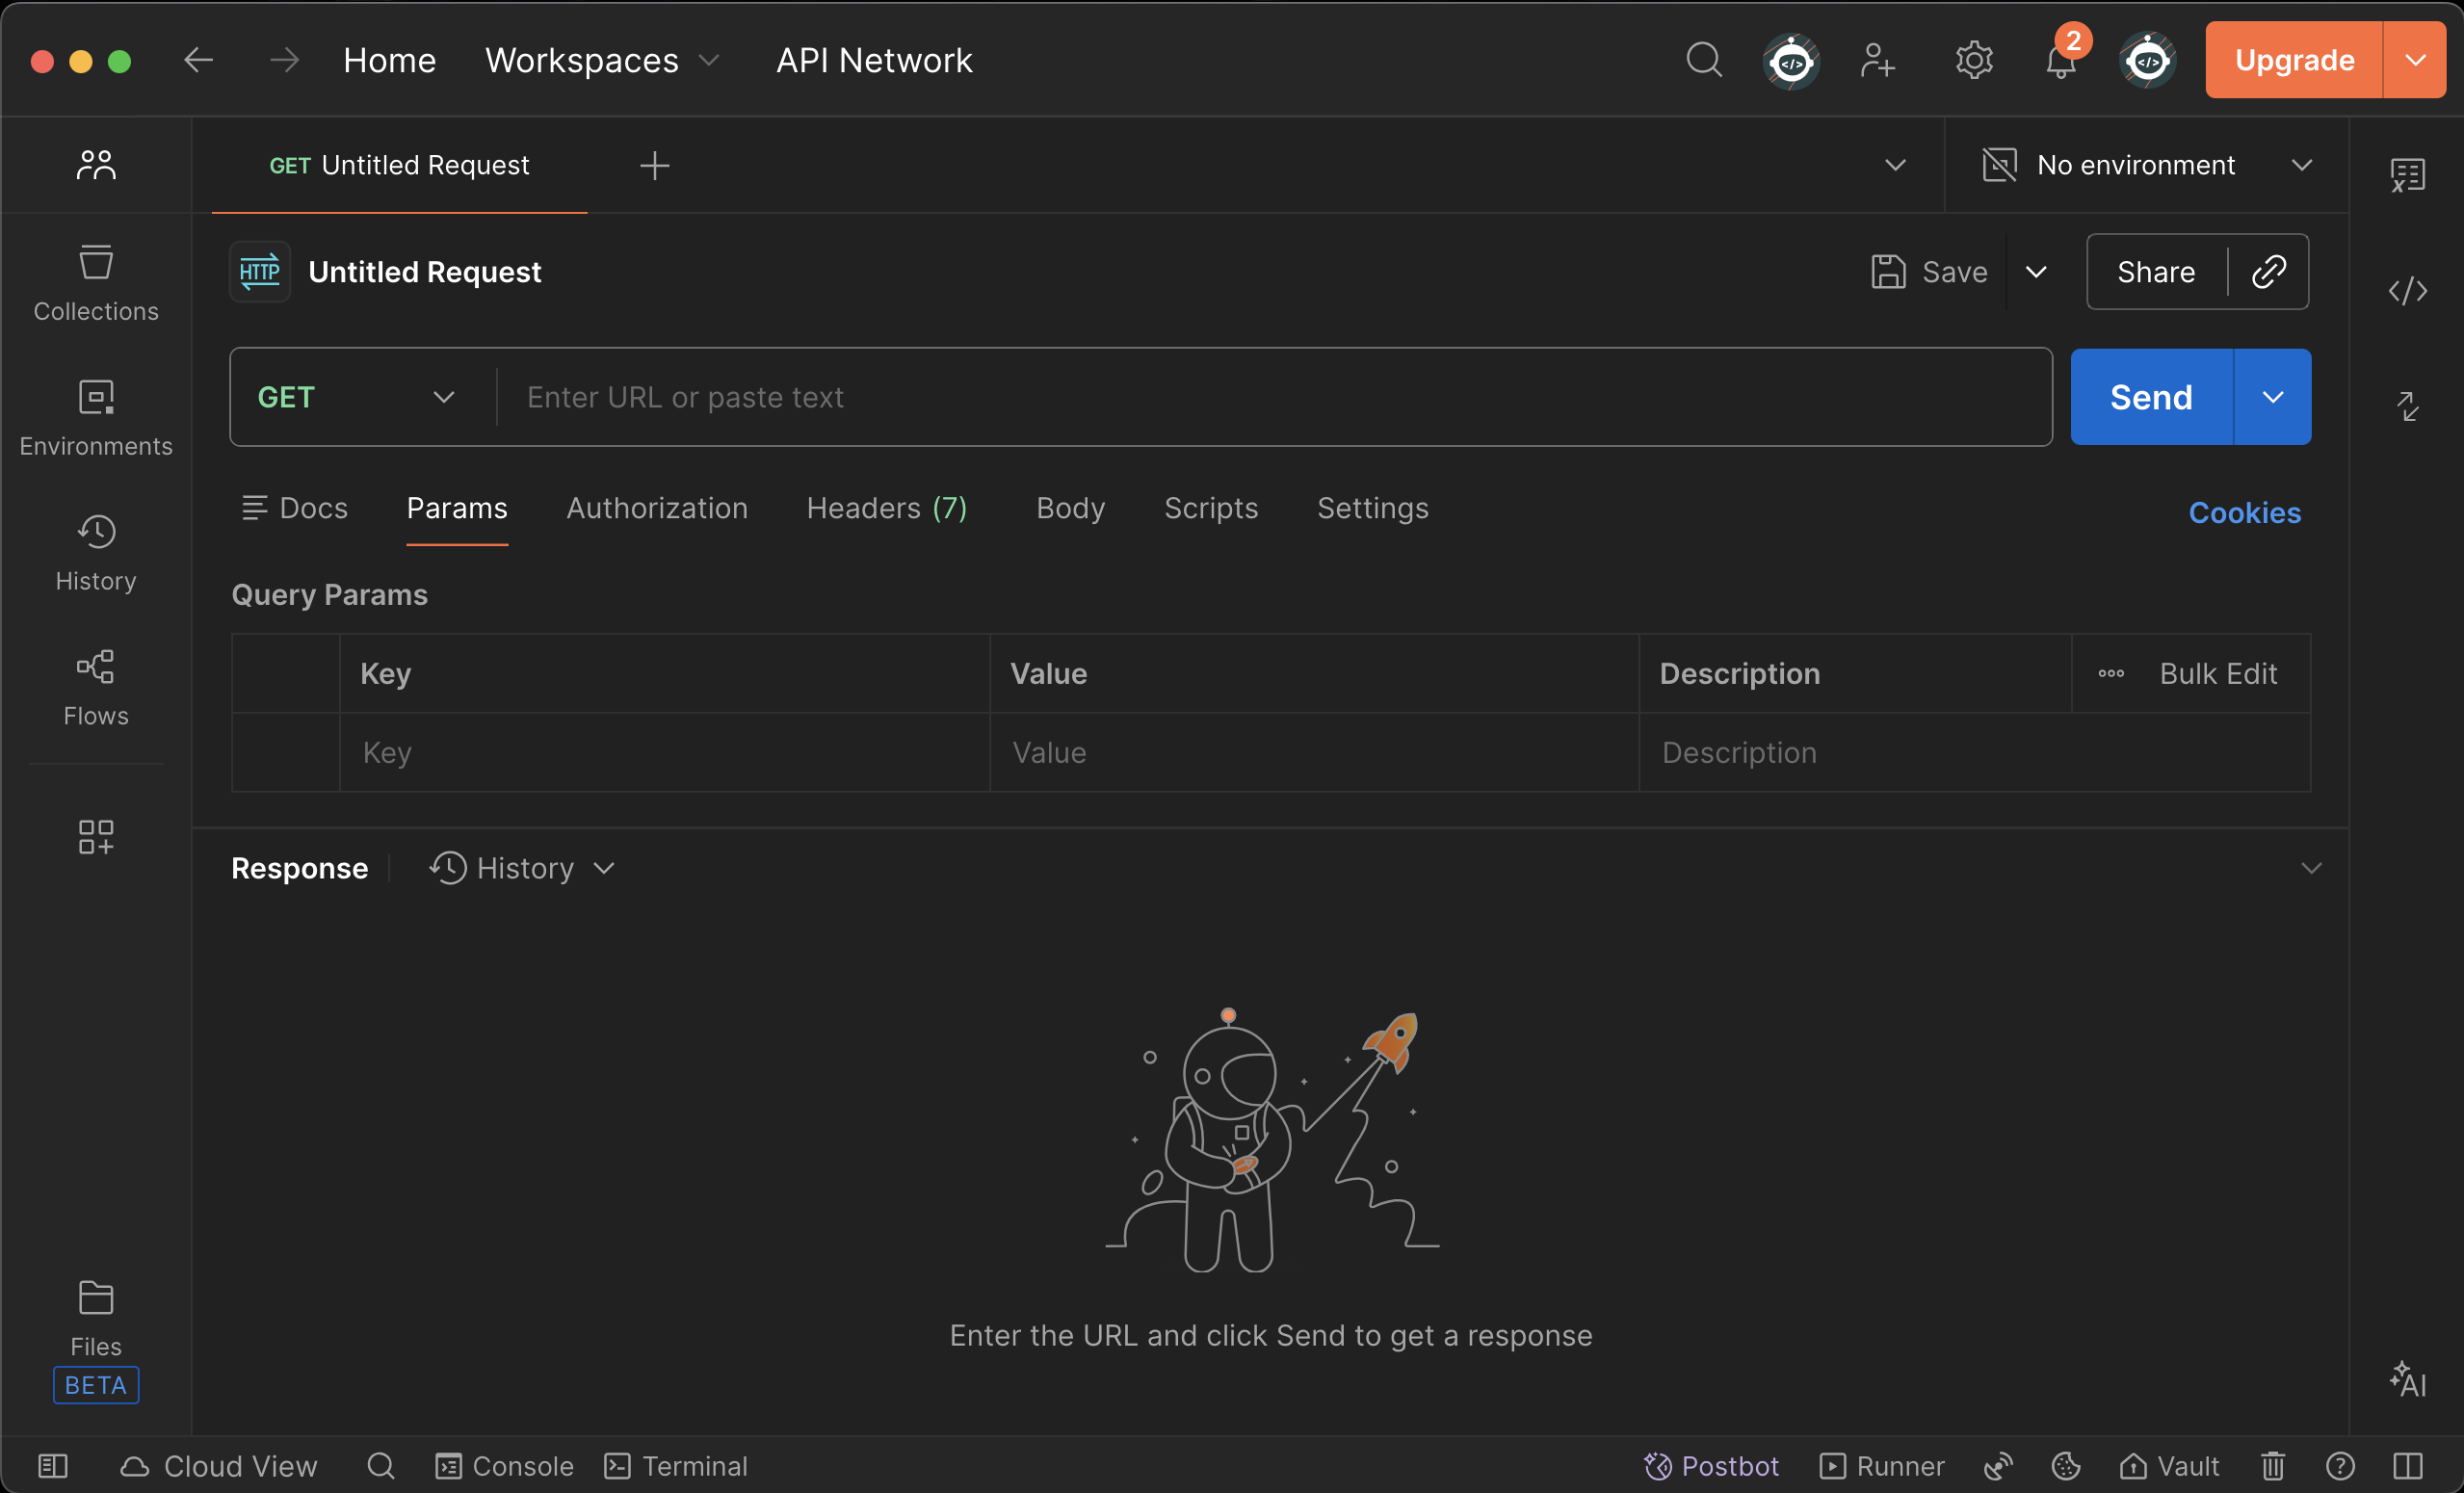
It allows you to:
- choose an endpoint
- select a request method (GET, POST, etc.)
- add headers and authentication
- send the request
- inspect the response
Think of it as a control panel for APIs. You can download it (Windows or Mac), or try the web version.
Choosing an API to Practice With
For a first API call, it’s best to use:
- a public or sandbox API
- something safe and read-only
- an example commonly used in documentation
Many APIs provide test endpoints for this purpose.
A good option for beginners is JSONPlaceholder, a free fake REST API that requires no authentication and offers endpoints such as /users, /posts, and /todos.
You can also search for “public REST API” or “fake API for testing” to find other examples. The exact API you use is less important than understanding the process.
What matters is that the documentation clearly explains:
Step One: Identify the Endpoint
From the API documentation, find an endpoint that retrieves information.
It may look like (using JSONPlaceholder as an example):
GET /users
GET /posts
GET /todos
The endpoint represents what you are asking for. Each path corresponds to a specific resource or action that the API can return or perform.
In Postman, you’ll enter the full URL, which usually includes:
- the base URL
- the endpoint path
For example, with JSONPlaceholder:
https://jsonplaceholder.typicode.com/users
This ties back to Part 2: The Anatomy of an API Request.
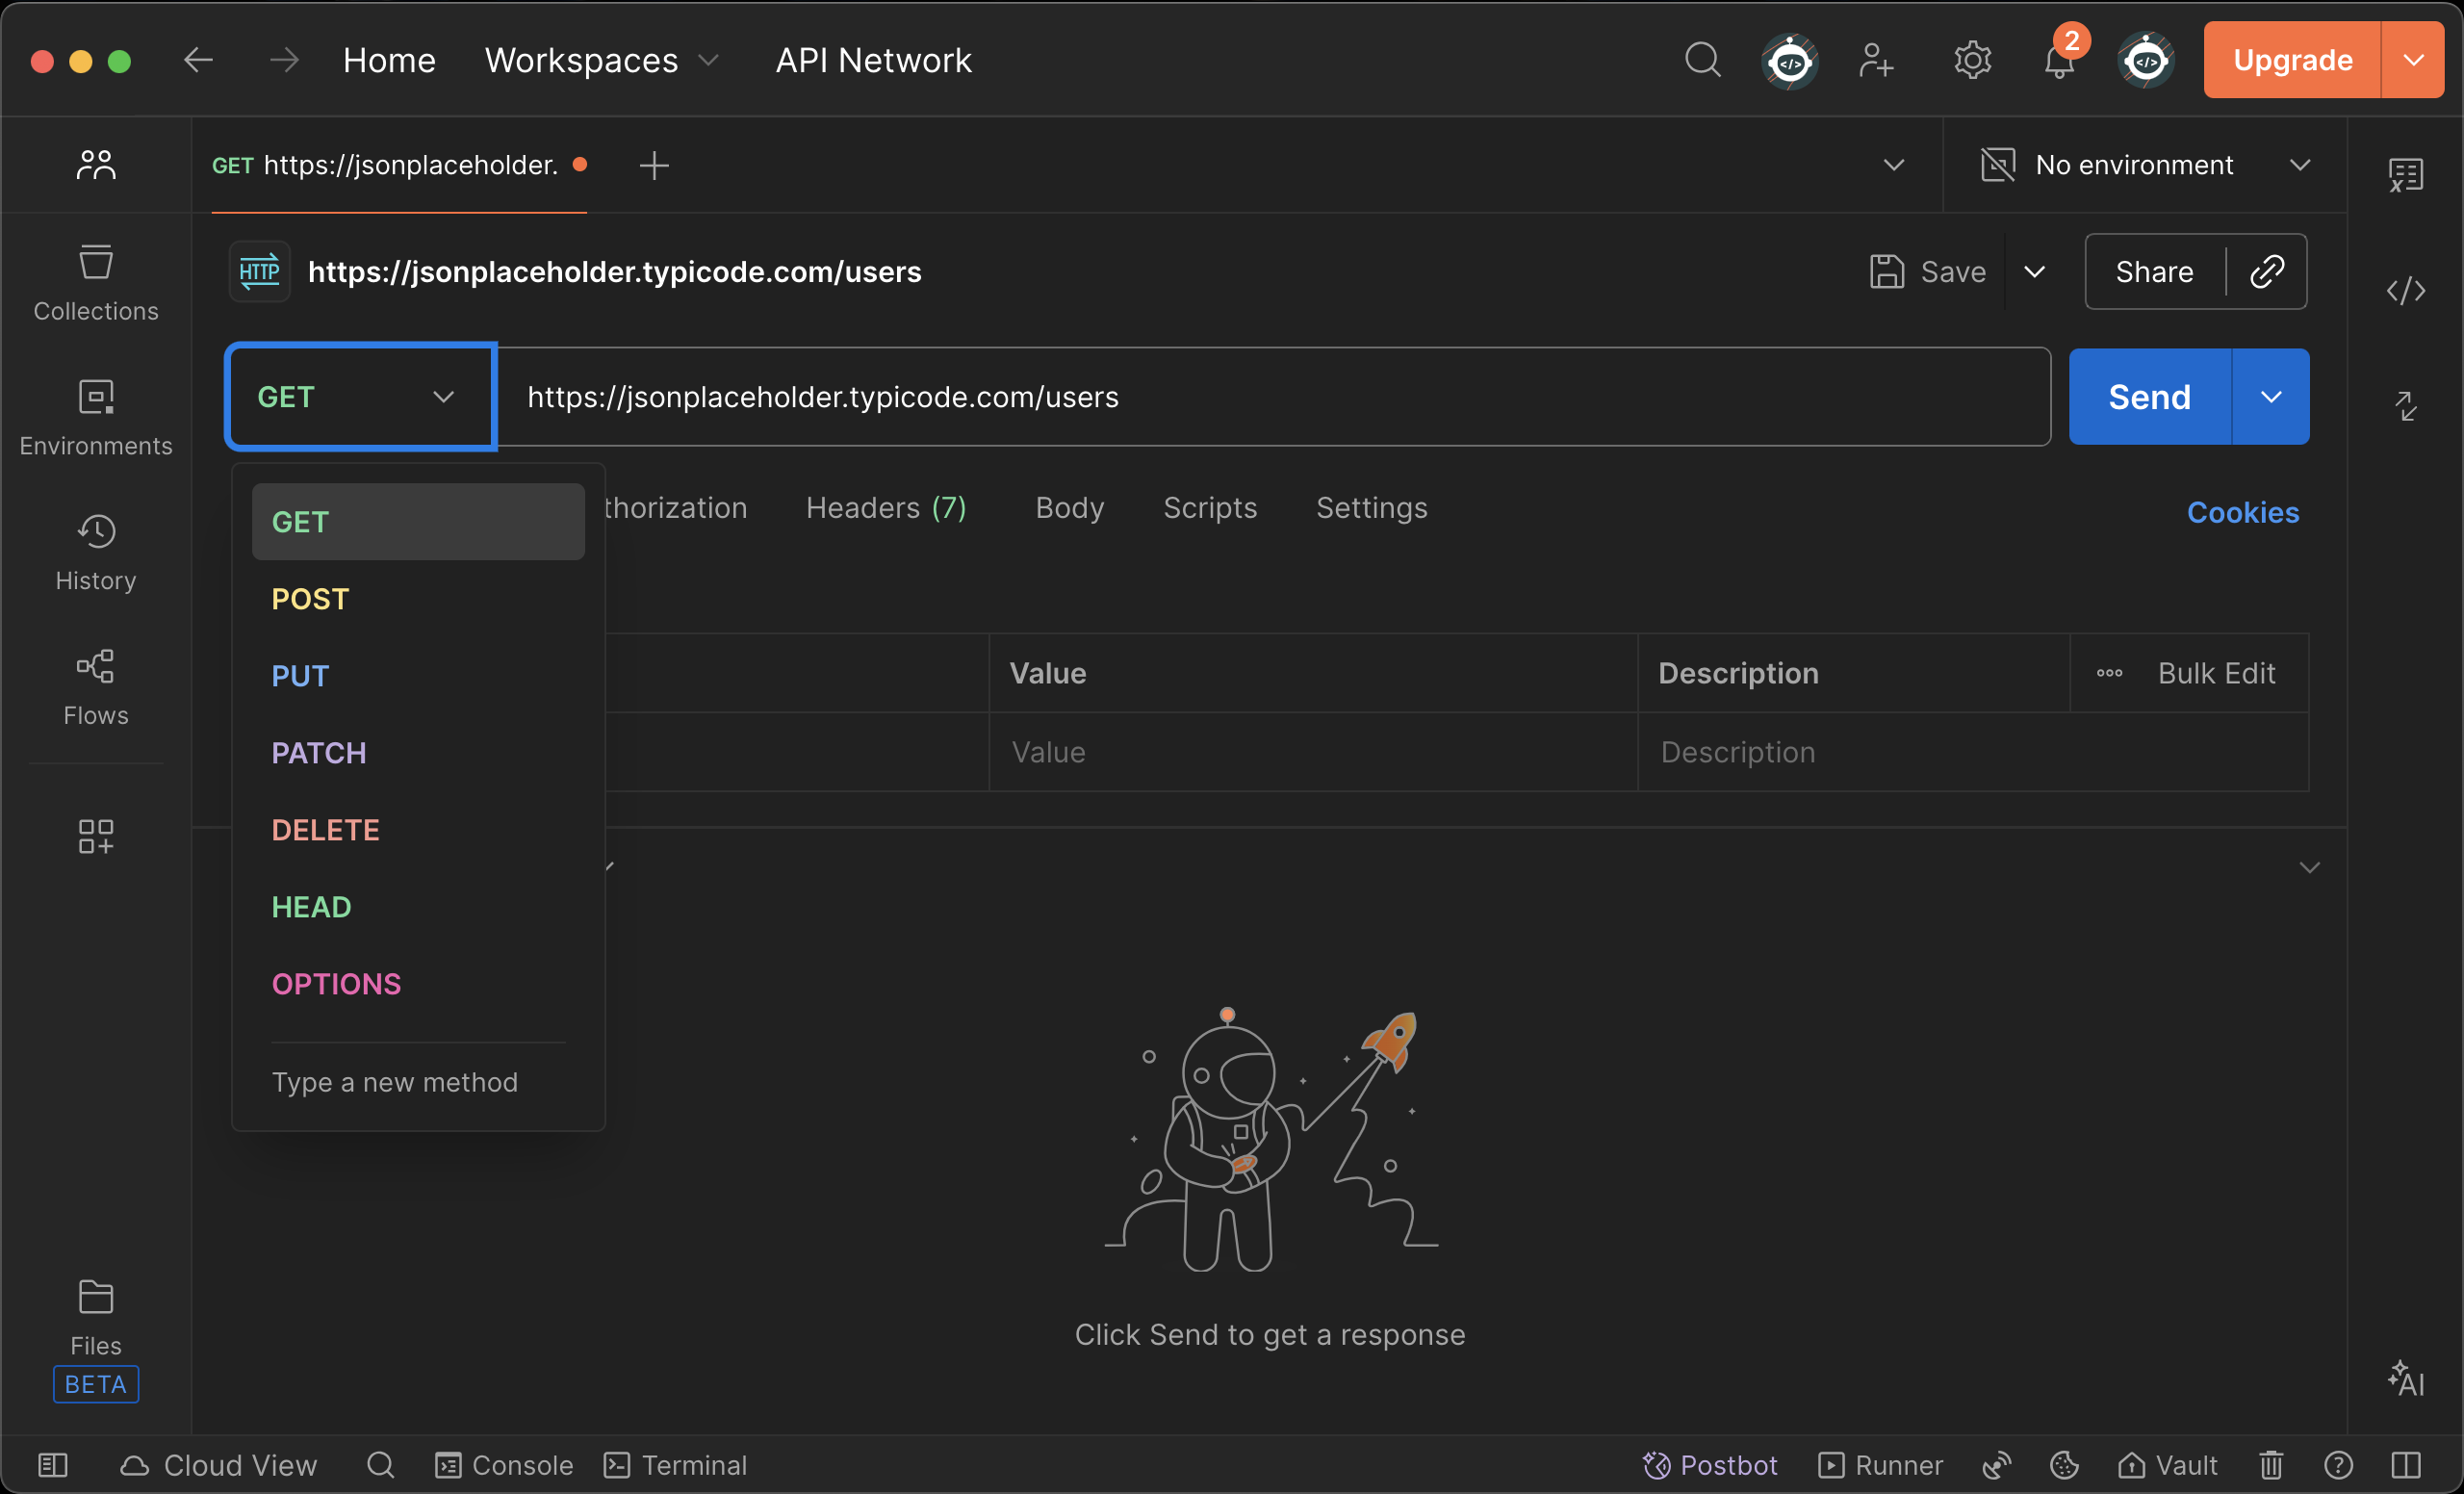
Step Two: Select the Request Method
Next, choose the request method. Most first calls use:
For JSONPlaceholder’s /users endpoint, you would select GET. In Postman, this is a dropdown next to the URL field.
- GET to retrieve information
You don’t need to remember what every method does. For now, focus on the intent:
- “I want to fetch data.”
Step Three: Add Authentication (If Required)
Many APIs require authentication, even for simple requests. JSONPlaceholder is an exception. It requires none, so you can skip this step when using it.
From the documentation, determine:
Commonly, this appears as a header such as:
Authorization: Bearer <token>
In Postman:
- go to the “Headers” or “Authorization” tab
- paste the credential provided by the API
This step connects directly to Part 4: Authentication. If authentication is missing or incorrect, the request will fail. That’s expected and normal.
Step Four: Send the Request
Once the URL, method, and headers are set:
- click Send

For example, with https://jsonplaceholder.typicode.com/users and GET selected, clicking Send will return a list of users. At this point, you’ve made an API call. No code was written, and no engineering environment was needed.
Reading the Response
The response is usually displayed in JSON format.
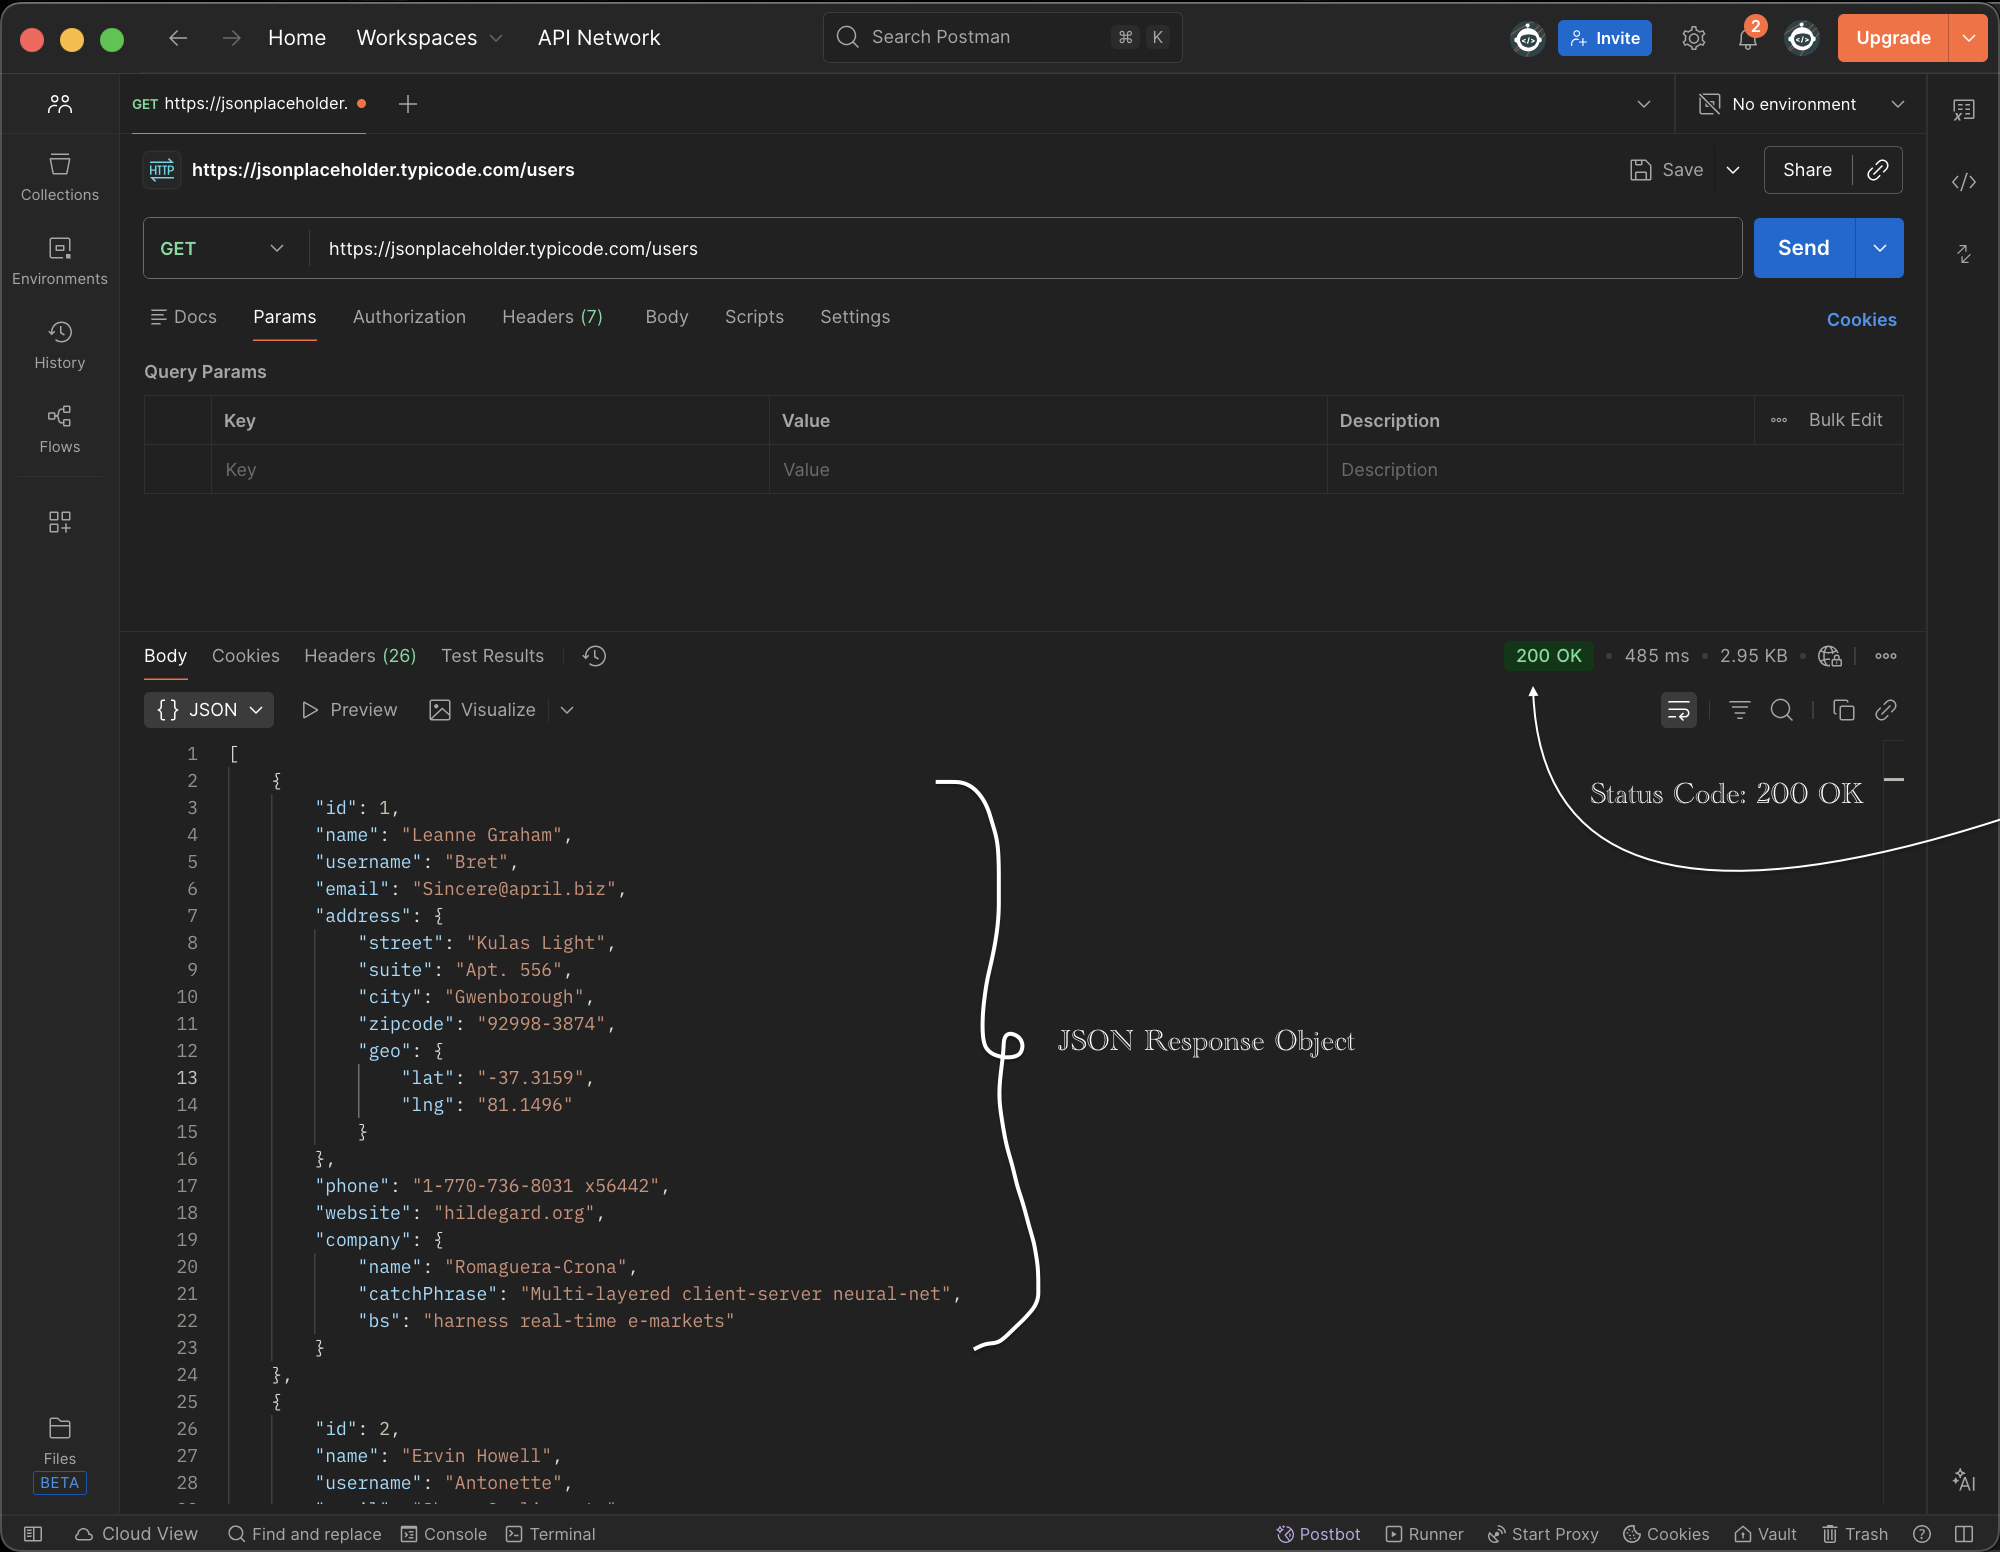
For https://jsonplaceholder.typicode.com/users, the response might look like this (the full response includes 10 users; here is the first):
[
  {
    "id": 1,
    "name": "Leanne Graham",
    "username": "Bret",
    "email": "Sincere@april.biz",
    "address": {
      "street": "Kulas Light",
      "suite": "Apt. 556",
      "city": "Gwenborough",
      "zipcode": "92998-3874"
    },
    "phone": "1-770-736-8031 x56442",
    "website": "hildegard.org",
    "company": {
      "name": "Romaguera-Crona",
      "catchPhrase": "Multi-layered client-server neural-net",
      "bs": "harness real-time e-markets"
    }
  }
]
The full response contains more user objects in the same format. At first glance, this may look dense, but don’t panic.
Focus on:
- the overall structure
- repeated fields
- identifiers
- status values
- timestamps
Ask:
- Did the request succeed?
- What kind of data is returned?
- Does this match what the documentation described?
This is where Part 6: Reading API Documentation pays off.
Understanding Status Codes
Every response includes a status code.
Common ones include:
- 200 → success
- 401 → authentication issue
- 403 → permission issue
- 404 → resource not found
- 429 → rate limit exceeded
Each code tells you what happened. When something goes wrong, the code points you to the cause. Error codes are feedback, not failures. For more on why APIs behave this way, see Part 3: Why APIs Behave the Way They Do.
What You’ve Just Done (Even If It Felt Simple)
By making this request, you have:
- used an endpoint
- selected a method
- included authentication
- sent a request
- interpreted a response
You’ve interacted directly with an API. This is the same basic process used by:
- backend services
- mobile apps
- dashboards
- integrations
The only difference is scale and automation. The same request structure works whether you are testing in Postman or building a product.
What to Try Next
Now that you have made your first API call, you can try a few more with JSONPlaceholder:
- Other endpoints. Use
https://jsonplaceholder.typicode.com/postsorhttps://jsonplaceholder.typicode.com/todoswith GET. The structure is the same. - A single resource. Use
https://jsonplaceholder.typicode.com/users/1to get one user instead of the full list. - POST. Change the method to POST, add a JSON body in the Body tab, and send to
https://jsonplaceholder.typicode.com/posts. JSONPlaceholder will not create real data, but you will see how a create request works.
Each of these uses the same steps: endpoint, method, send, read the response.
Common First-Time Issues (And Why They’re Normal)
If something didn’t work immediately, that’s expected. Most first-time issues have simple causes that are easy to fix once you know what to check.
Common reasons include:
- missing headers
- incorrect environment (sandbox vs production)
- expired credentials
- incorrect URL
- insufficient permissions
These are not mistakes. They are a normal part of learning how APIs communicate and how systems exchange information.
Why This Matters for Non-Engineers
Making a single API call changes how you think about systems. It helps you:
- read documentation with context
- understand why engineers ask certain questions
- debug issues more effectively
- participate confidently in technical discussions
- explain system behaviour to others
You don’t need to build integrations or write production code to benefit from this understanding. The insight alone changes how you approach technical discussions and system design.
Looking Back at the Series
Across these seven articles, we’ve covered:
- What APIs are and where they fit
- How API requests are structured
- Why APIs behave the way they do
- How authentication works
- How systems communicate through integrations
- How to read API documentation effectively
- How to interact with an API yourself
Each part builds on the previous one, so the series is best read in order from start to finish.
Final Thought
The goal of this series was to make APIs understandable. APIs are agreements between systems. Once you see how those agreements are structured and enforced, they stop being intimidating. You have reached that point. You can now read documentation, follow technical discussions, and make API calls with confidence.